What is This Project All About?
In this project I’m setting up honeypots which is an SSH honeypot (cowrie) and a web honeypot (snare + tanner) where I analyze malicious activities from users from the internet. I setup the honeypots on AWS C2 Ubuntu instances.
Introduction to Honeypots
What’s A Honeypot?
A honeypot is a security tool set up to attract and trap hackers or malicious software. It looks like a real, vulnerable system or network, but it’s actually a decoy designed to lure attackers. By monitoring what happens in the honeypot, security experts can learn about the techniques and tools hackers use, which helps them improve defenses for real systems. Essentially, it’s like setting up a fake target to see what attackers are up to and to protect the real valuable systems better.
What’s Snare and Tanner?
SNARE is a web application honeypot and is the successor of Glastopf, which has many of the same features as Glastopf as well as ability to convert existing Web pages into attack surfaces with TANNER. Every event sent from SNARE to TANNER is evaluated, and TANNER decides how SNARE should respond to the client. This allows the honeypot to produce dynamic responses which improves its camouflage. SNARE when fingerprinted by attackers shows that it is a Nginx Web application server.
What’s Cowrie?
Cowrie is a medium to high interaction SSH and Telnet honeypot designed to log brute force attacks and the shell interaction performed by the attacker. In medium interaction mode (shell) it emulates a UNIX system in Python, in high interaction mode (proxy) it functions as an SSH and telnet proxy to observe attacker behavior to another system.
Cowrie Honeypot
Cowrie Setup
Change ssh port
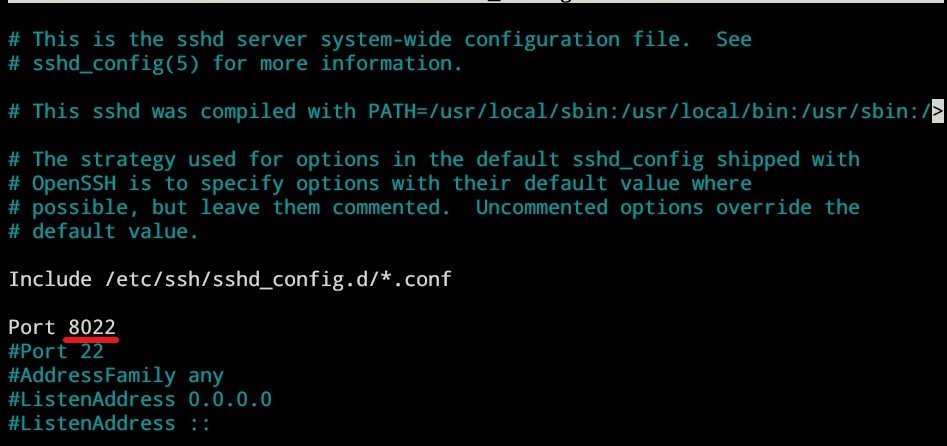
The default ssh port is 22, we’re gonna change it to 8022 since port 22 is going to be used by cowrie to trap the attacker which is going to be redirected to port 2222 in the next steps which is a port used by cowrie to emulate ssh client. Use the following bash script that I made:
#!/usr/bin/bash

cd /etc/ssh/
sudo nano sshd_config
sudo systemctl restart ssh
Then, add the following line:
Restart the instance: sudo systemctl restart ssh
Reconnect to the server using port 8022
Add the port 8022 to inbound rules
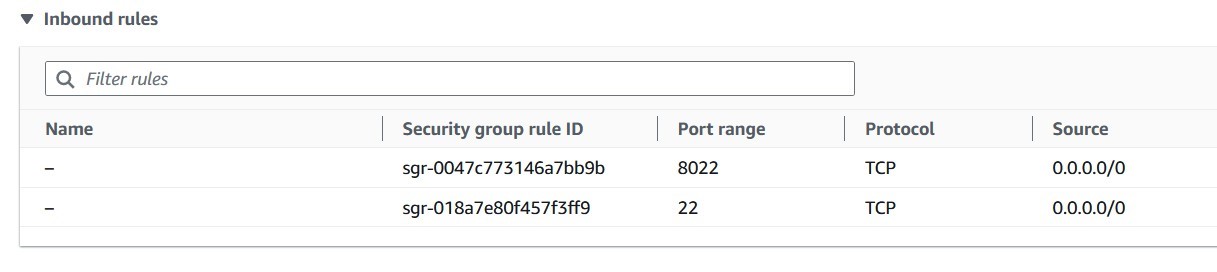
ssh -i "keypair.pem" admin@ec2.us-west-1.compute.amazonaws.com -p 8022
Create new user
add the new user: sudo adduser --disabled-password cowrie
login as cowrie: sudo su - cowrie
Install necessary cowrie dependencies
Use the following bash script that I custom made:
#!/usr/bin/bash

sudo apt-get update && sudo apt-get upgrade -y
sudo apt update -y
sudo apt-get install lnav git python3-virtualenv libssl-dev libffi-dev build-essential libpython3-dev authbind -y
git clone http://github.com/cowrie/cowrie
cd cowrie
virtualenv cowrie-env
source cowrie-env/bin/activate
pip install --upgrade pip
pip install --upgrade -r requirements.txt
cd etc
cp cowrie.cfg.dist cowrie.cfg
exit
Reroute tcp traffic on port 22 to port 2222
Here, we’re gonna reroute anything that’s connecting to port 22 to 2222 which is a port used by cowrie to emulate ssh client: sudo iptables -t nat -A PREROUTING -p tcp --dport 22 -j REDIRECT --to-port 2222
Start cowrie
login as cowrie: sudo su cowrie
change dir: cd ~/cowrie/bin
start cowrie: cowrie start
Analyze the Logs
go to cowrie dir: cd var/log/cowrie
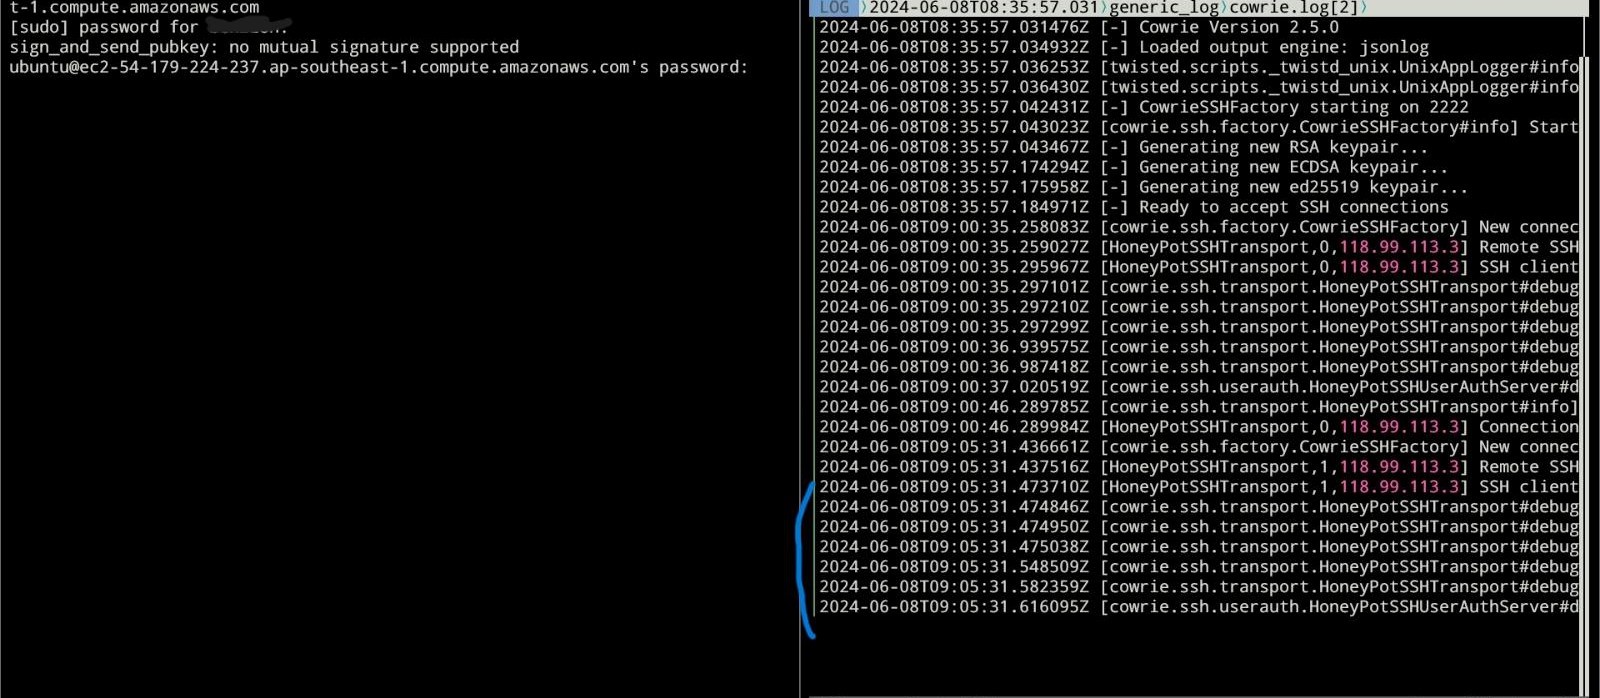
Analyze the logs: lnav cowrie.log
Testing result
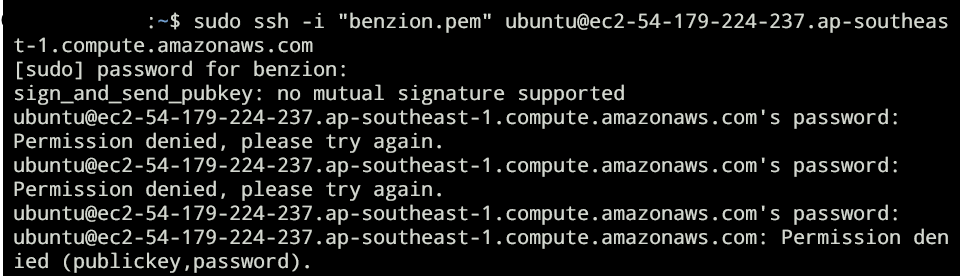
Before ssh attempt:
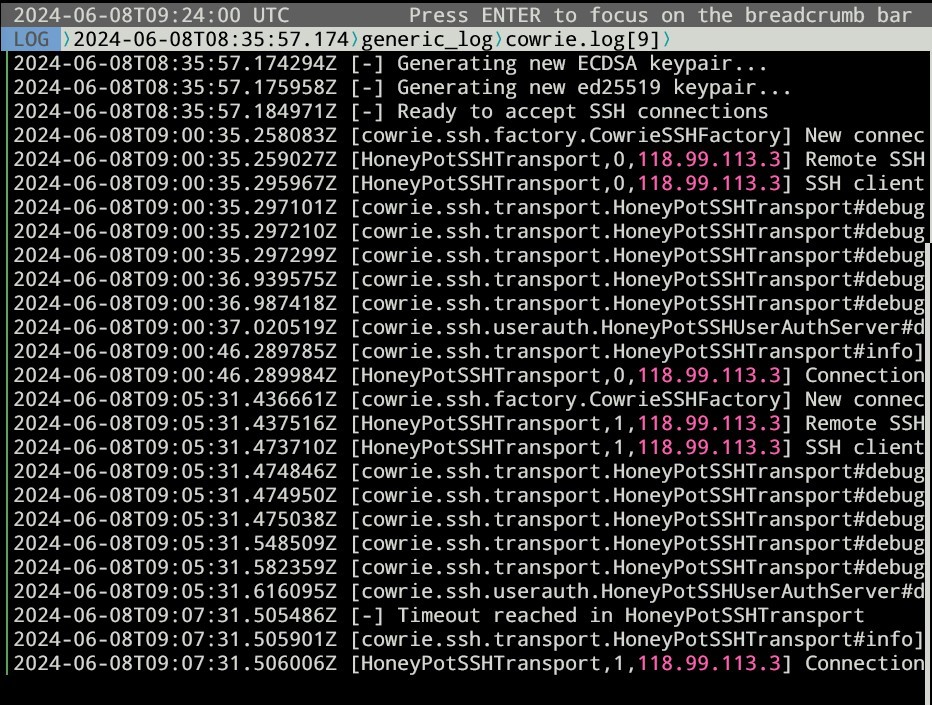
After ssh attempt (port 22):
Cowrie: Analyzing Hackers’ Activities using MySQL
First, we have to install mysql. I use the following guide for installation:
https://www.digitalocean.com/community/tutorials/how-to-install-mysql-on-ubuntu-20-04
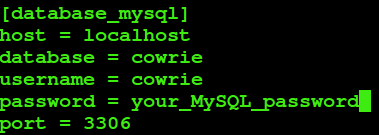
We then have to configure mysql for cowrie. I use the following guide:
https://cowrie.readthedocs.io/en/latest/sql/README.html
When an attacker tries to access using ssh, as such:
We’re going to be able to capture the usernames and their passwords using mysql:
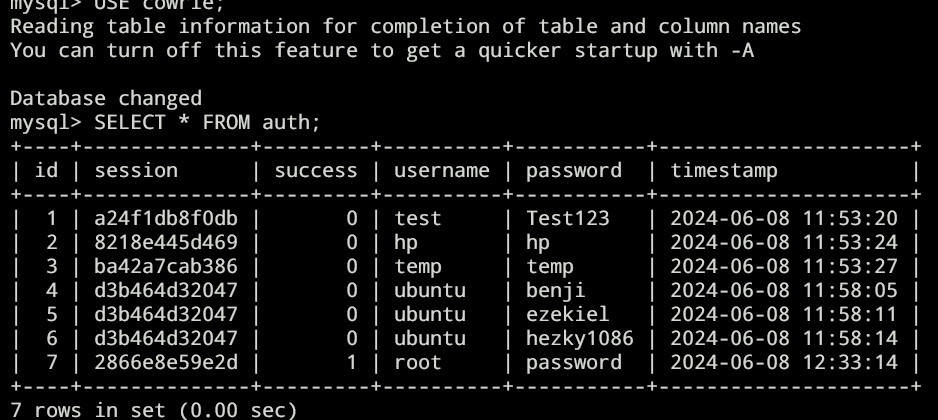
After waiting for sometimes, here’s the result:
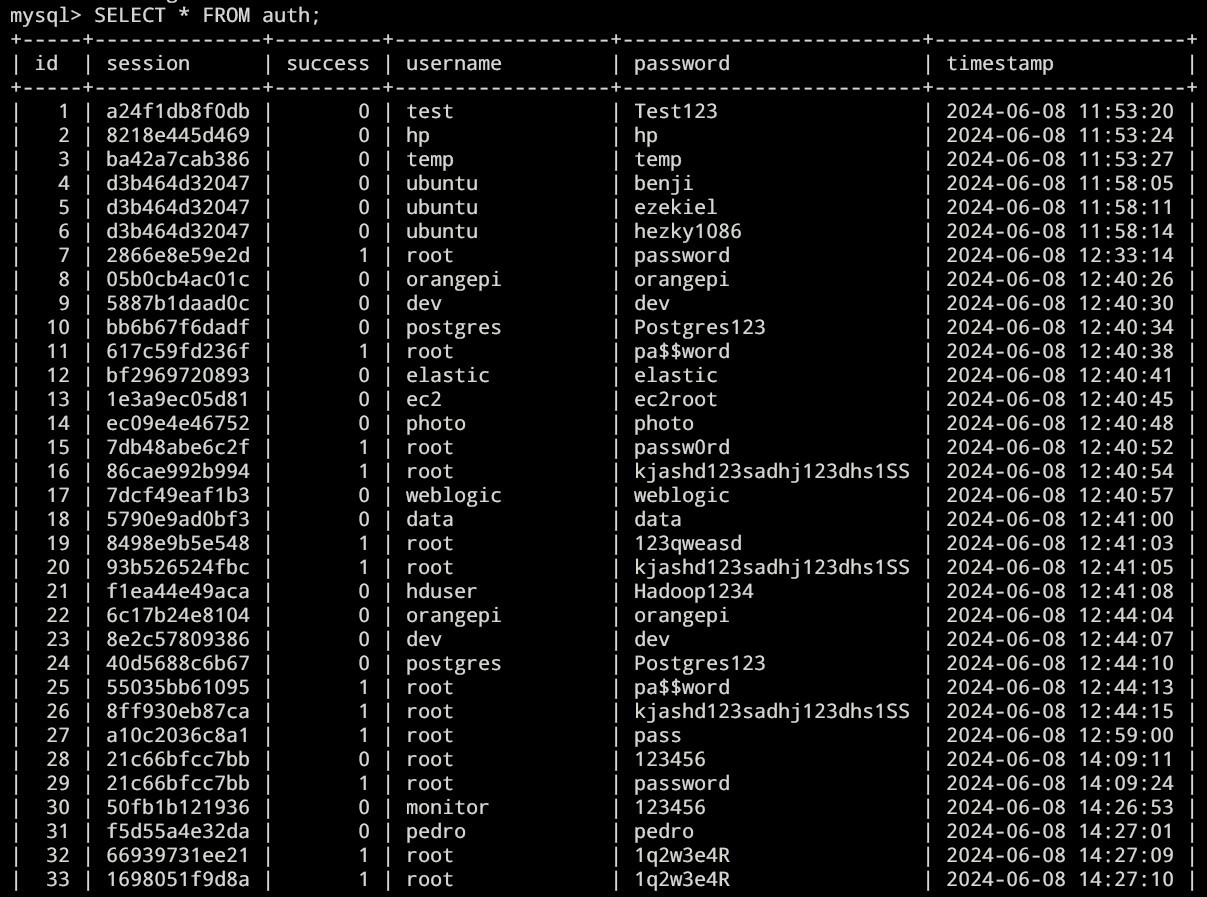
Here’s the full result: https://paste.sh/Hw4pP8yR#heqzsBlSX_JL4gyyB81_Hjx2
We could also see all the sessions, connections time, ip, etc:
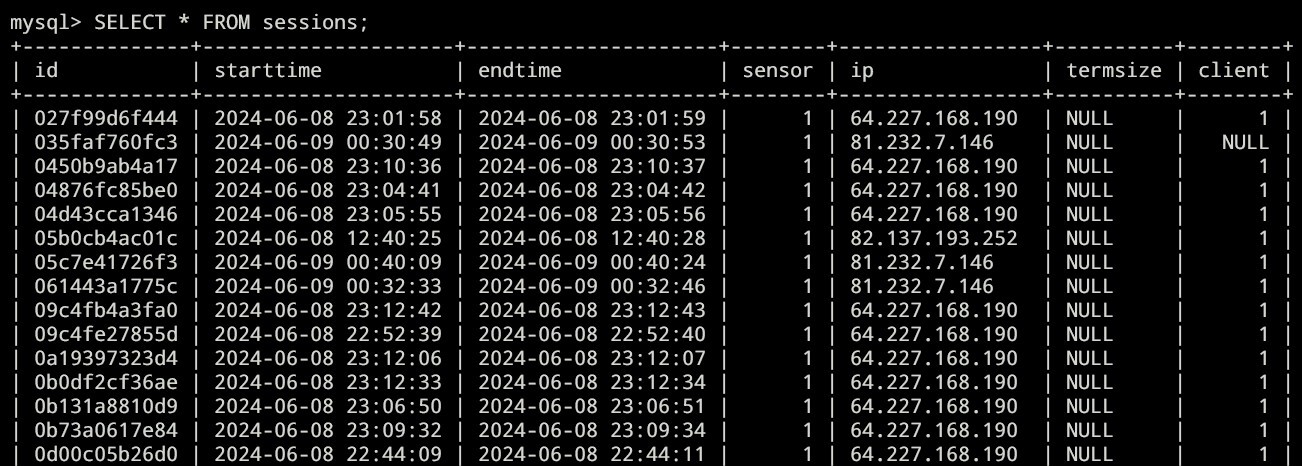
Here’s the full result:
https://paste.sh/WRQczvo8#q6pq-CGB89UzWhOdACR6yHoa
We could also see the downloaded stuffs to the honeypot machine which downloads stuffs like malwares:
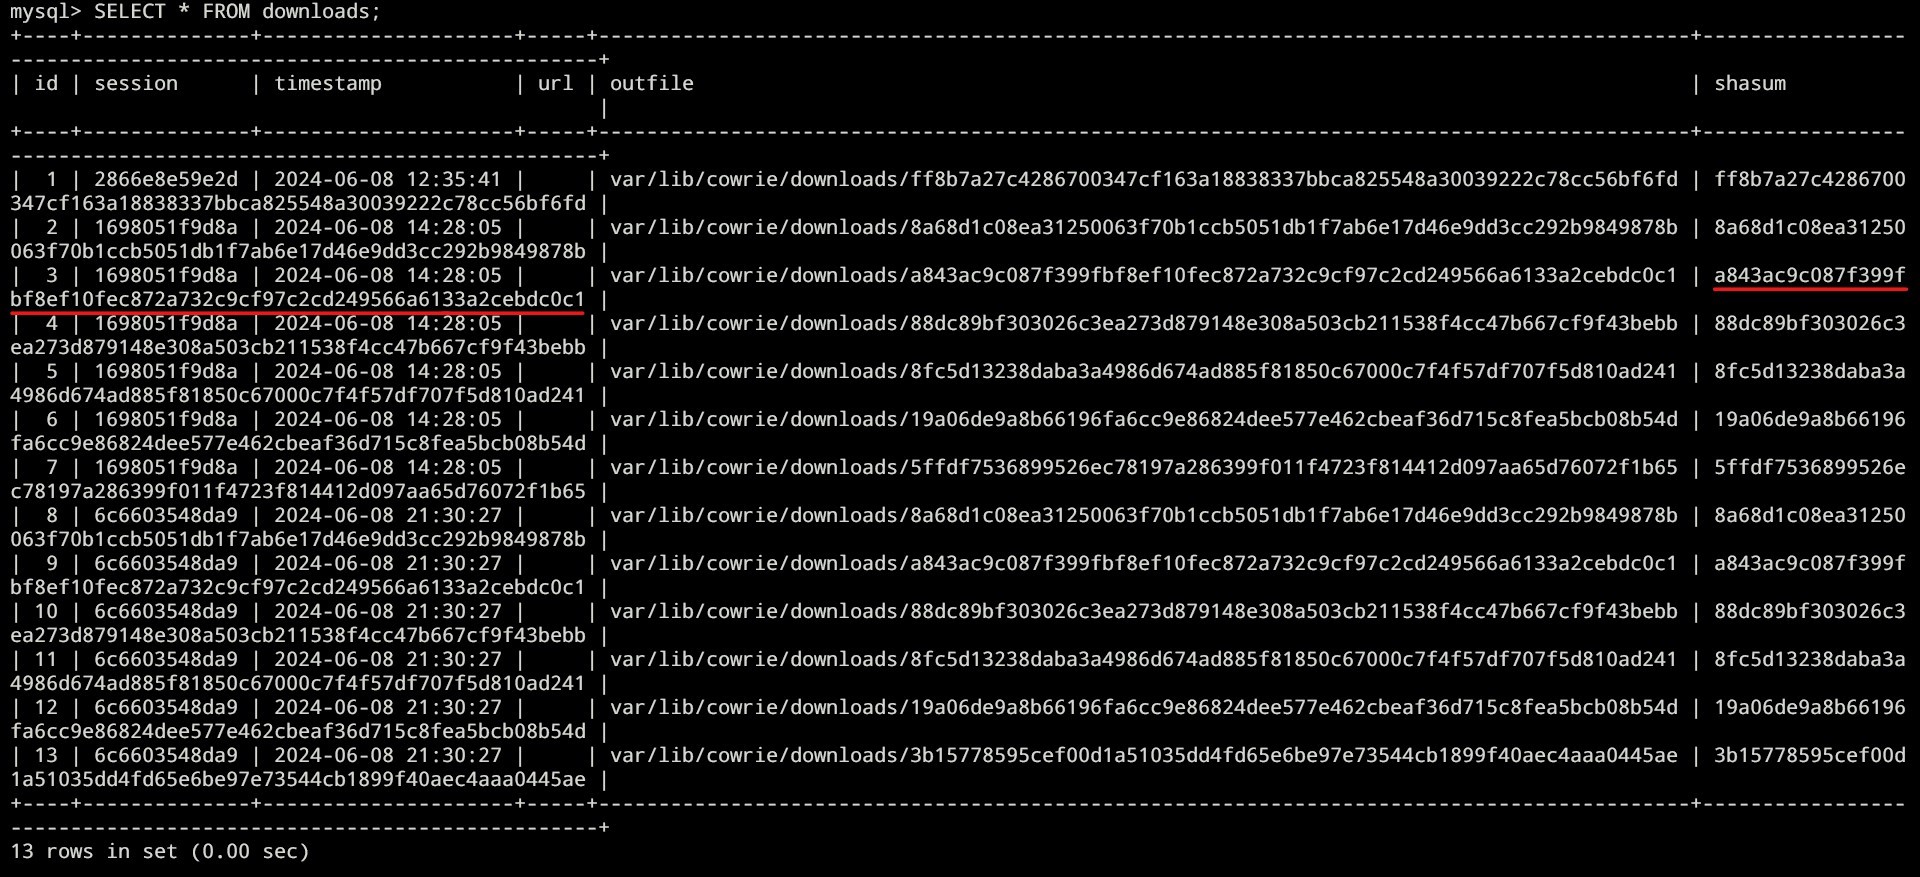
When we check the above hash, we get the following:
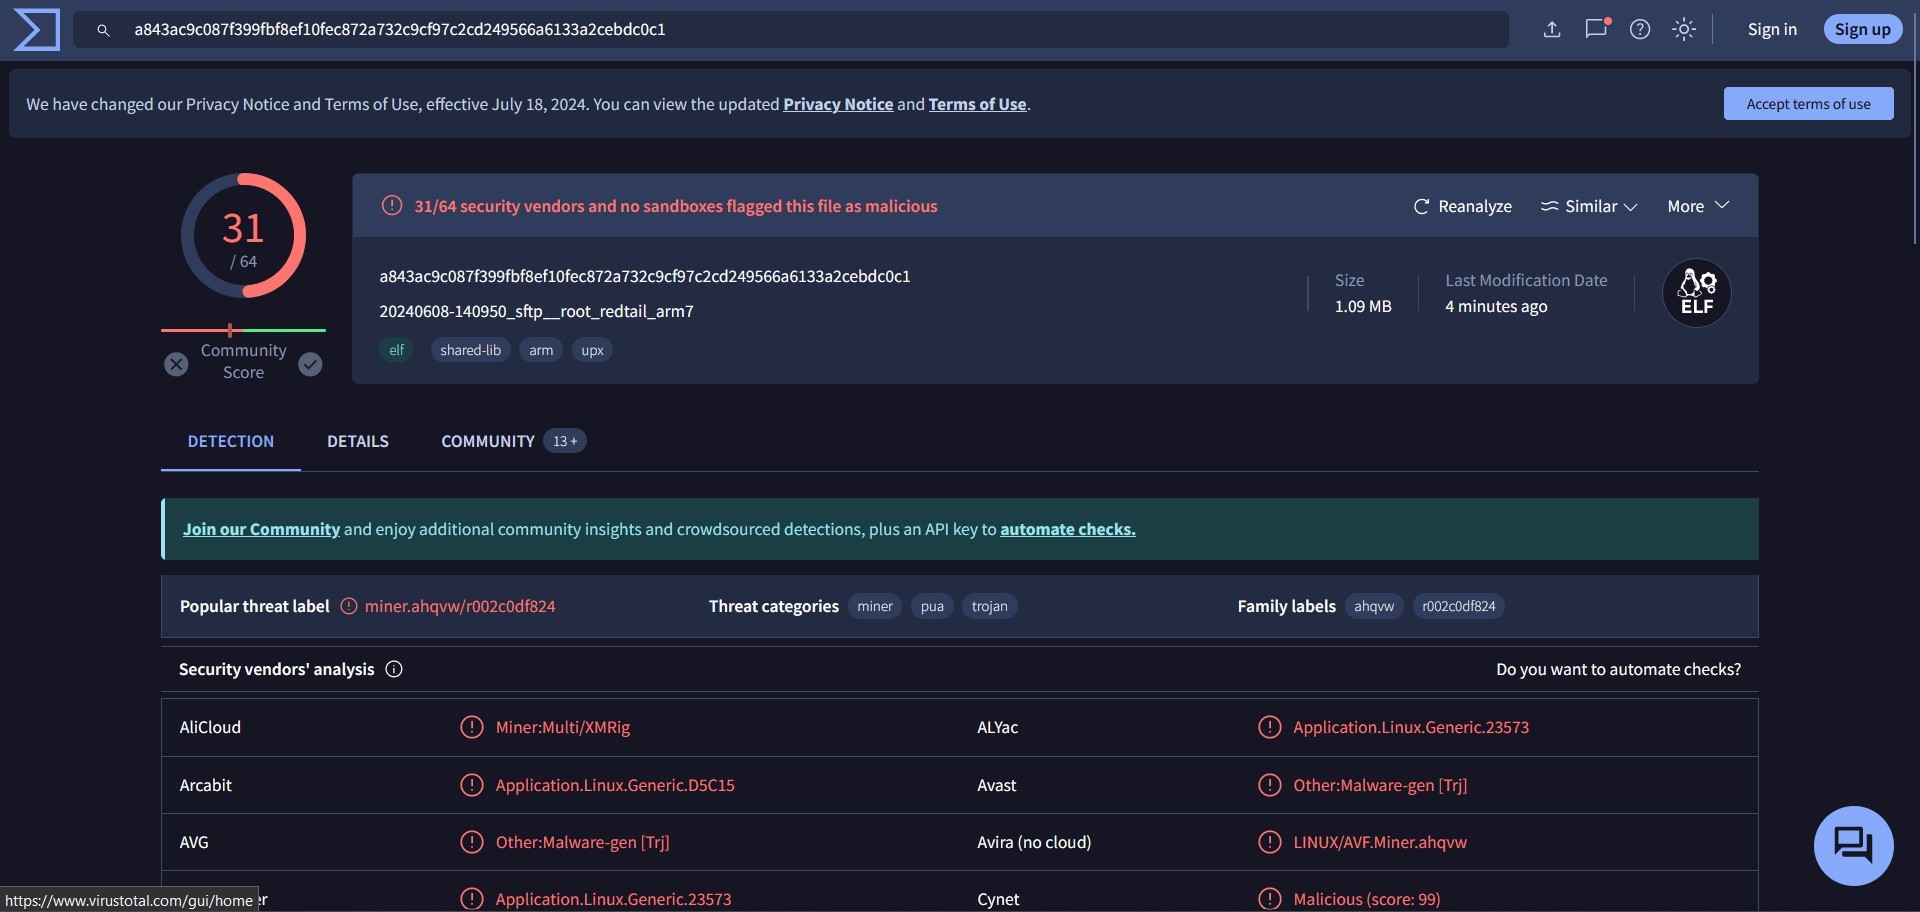
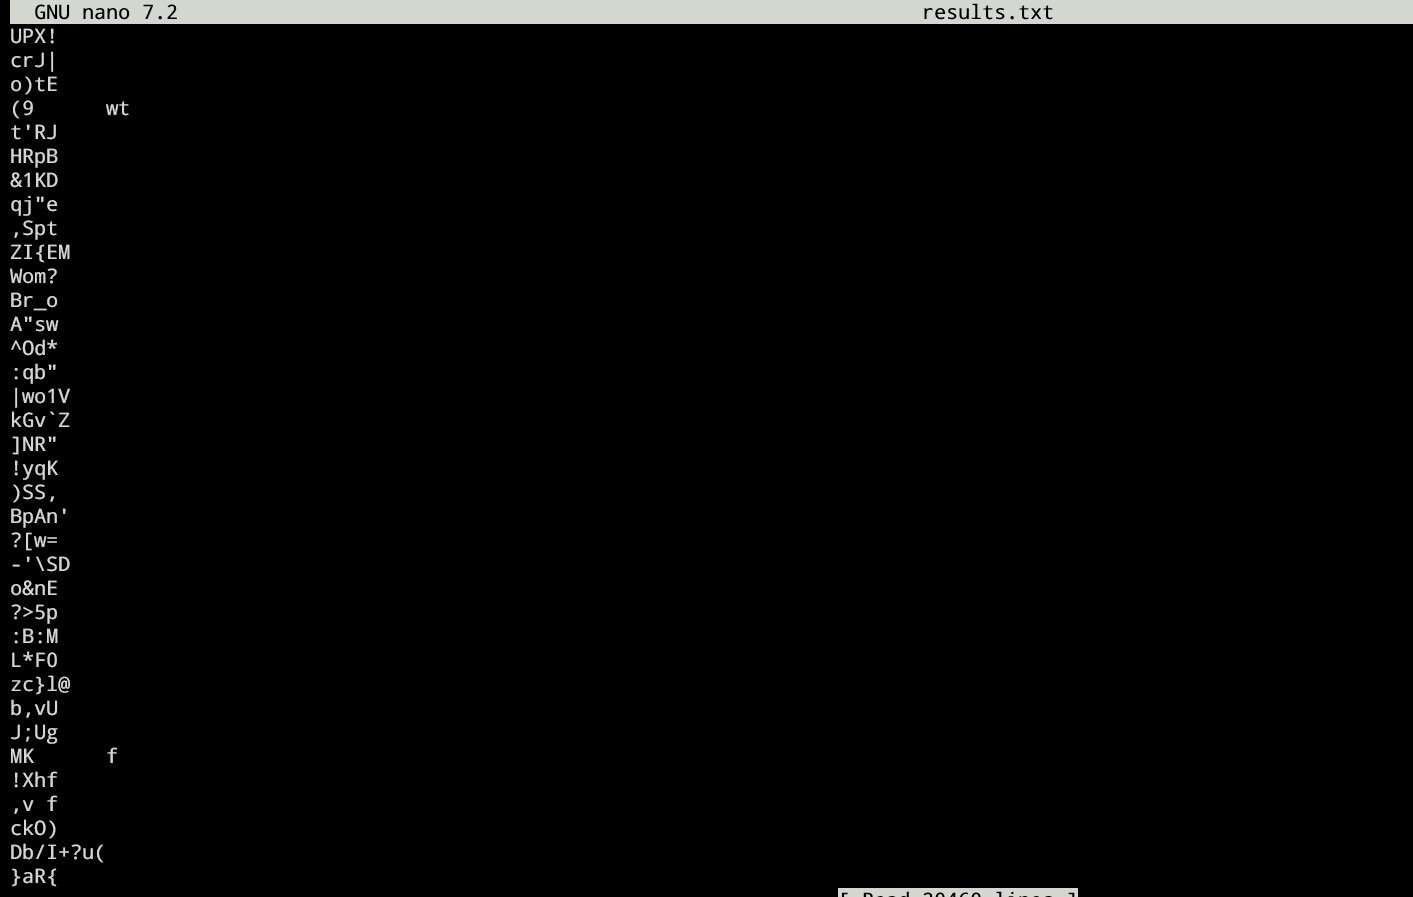
We could analyze the downloaded stuffs here: ~/cowrie/var/lib/cowrie/downloads and do the analysis using standard malware analysis methods:
Here’s an example: strings [file hash]
Cowrie: Analyzing Hacker Activity Logs
When a hacker logged in to the cowrie machine and do stuffs like the following:
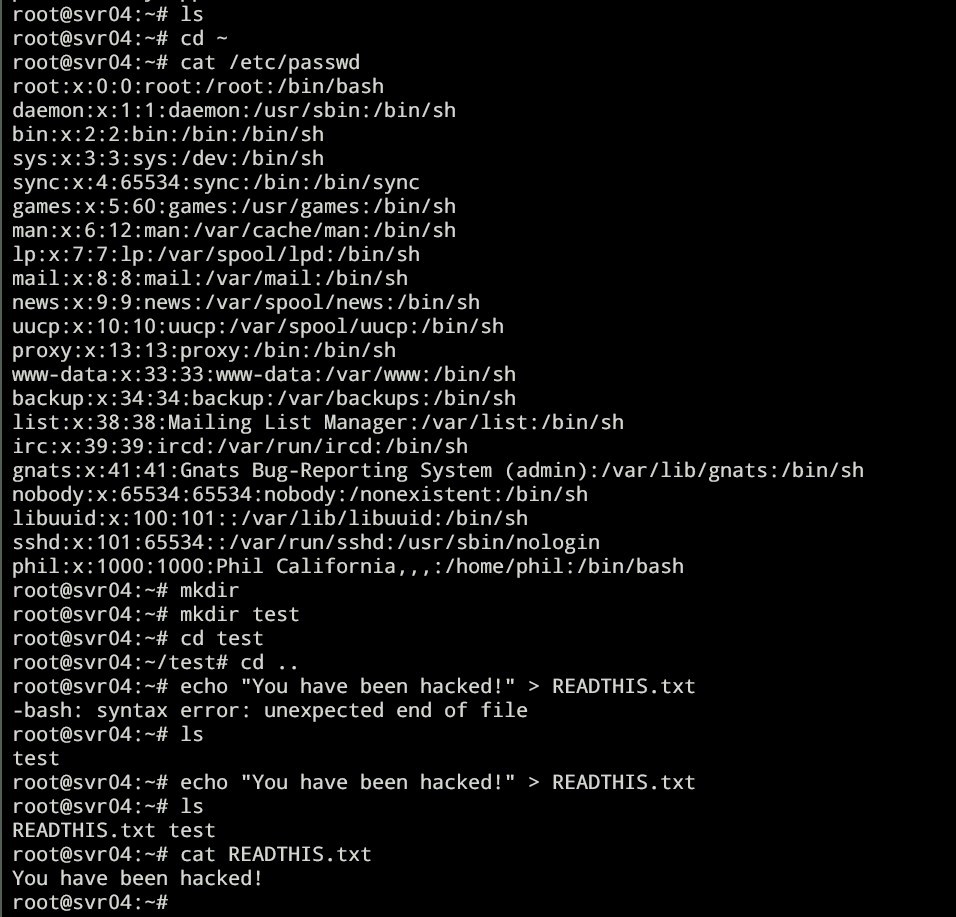
We can analyze what the hacker is doing using cowrie. Go to ~/cowrie/var/lib/cowrie/tty then do ls

You can see the sessions of the hackers listed out which we can analyze using strings linux command or playlog library by cowrie.
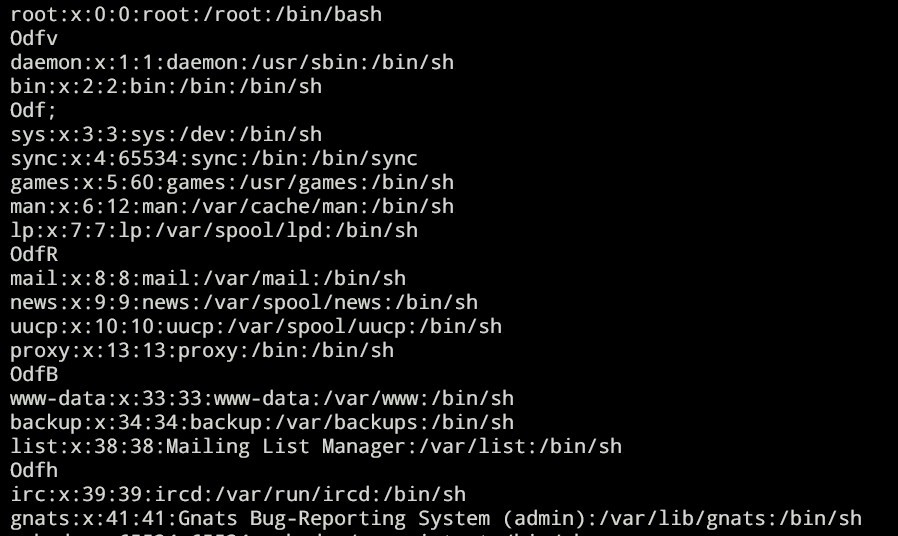
Here’s the result after waiting for sometimes:

In this example: strings fae9b1d8def52063fd37bc2be85948fb75b70c7f34de6bdea8f7c0845867fb6d | less
Here’s the results:
We could also see the hackers’ informations in cowrie/var/log/cowrie/cowrie.json

From the above example, we can see the hacker’s source ip, duration, etc. When we analyze using cowrie/bin/playlog, we can replay what the hacker’s
doing in the machine such as the following: https://drive.google.com/file/d/1qNJEmvPqZt6mYvlksuD_X48-0UQkX3PQ/view? usp=sharing
Snare and Tanner
Tanner Setup
Install Docker
Install docker using the following bash script that I custom made:
#!/usr/bin/bash

sudo apt-get install ca-certificates curl -y
sudo install -m 0755 -d /etc/apt/keyrings
sudo curl -fsSL https://download.docker.com/linux/ubuntu/gpg -o /etc/apt/keyrings/docker.asc
sudo chmod a+r /etc/apt/keyrings/docker.asc
echo \
"deb [arch=$(dpkg --print-architecture) signed-by=/etc/apt/keyrings/docker.asc]
https://download.docker.com/linux/ubuntu \
$(. /etc/os-release && echo "$VERSION_CODENAME") stable" | \
sudo tee /etc/apt/sources.list.d/docker.list > /dev/null
sudo apt update -y
sudo apt install docker-ce docker-ce-cli containerd.io -y
Install Tanner
Install Tanner using the following bash script that I custom made:
#!/usr/bin/bash

# clone tanner
git clone https://github.com/mushorg/tanner.git
cd tanner/docker/tanner

# Insert updated requirements
echo "aiohttp" > requirements.txt && \
echo "aiomysql" >> requirements.txt && \
echo "aiohttp-jinja2==1.5.1" >> requirements.txt && \
echo "docker<2.6" >> requirements.txt && \ echo "mimesis<3.0.0" >> requirements.txt && \ echo "yarl" >> requirements.txt && \
echo "redis" >> requirements.txt && \ echo "aioredis" >> requirements.txt && \ echo "pymongo" >> requirements.txt && \
echo "pylibinjection" >> requirements.txt && \
echo "jinja2" >> requirements.txt && \
echo "MarkupSafe<2.1.0" >> requirements.txt && \
echo "pycodestyle" >> requirements.txt && \
echo "geoip2" >> requirements.txt && \ echo "aiodocker" >> requirements.txt && \ echo "tornado" >> requirements.txt && \ echo "mako" >> requirements.txt && \ echo "pyjwt" >> requirements.txt && \
echo "pyyaml" >> requirements.txt && \

# then
pip3 install --no-cache-dir -r requirements.txt && \
sudo docker compose build

# Testing tanner run
sudo docker-compose up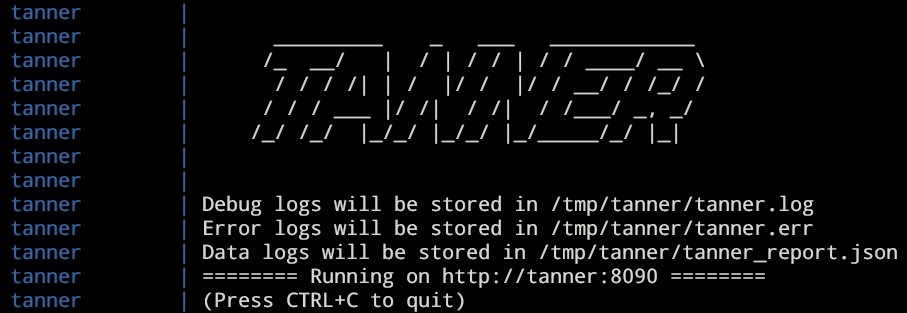
Snare Setup
Clone The Repo
clone the repo: git clone https://github.com/mushorg/snare.git
change dir: cd snare
Tanner config
Change the tanner ip and port in Dockerfile
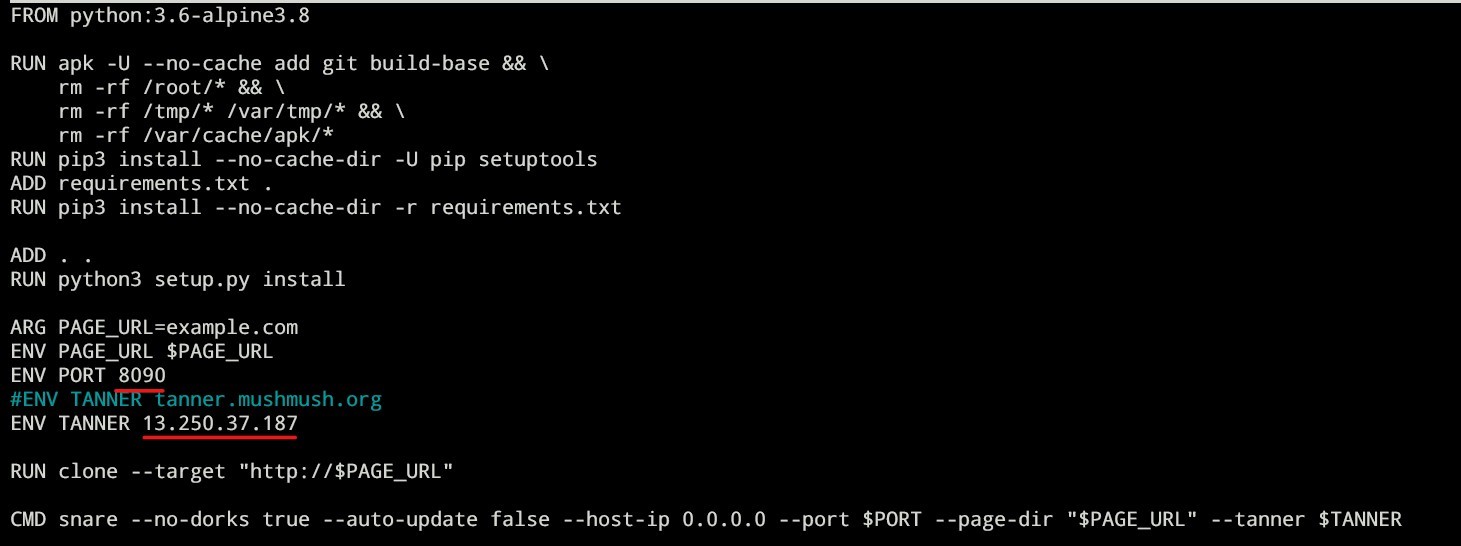
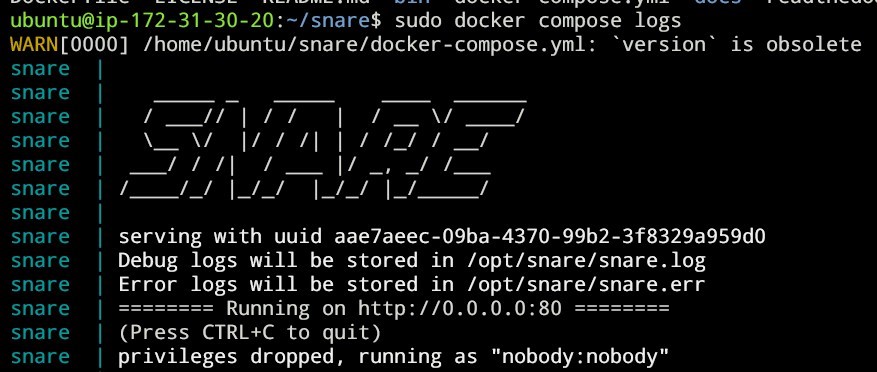
Build snare: sudo docker compose build
Testing snare run: sudo docker compose up